When I decided to build this plane and blog the progress I made somewhat of a table of contents of what I wanted to cover. My main goal is to maybe make this all a bit less intimidating for a newcomer. See Parts One, TwoThree,Four,Five and Six to see all the steps to this project.
Tiny 17" Wingspan and flying weight of 3 ounces, balsa wood cover in very thin shrink. I built this few years ago, crazy fast brushless motor and a symmetrical airfoil
Nieuport 17 - 32" wingspan balsa covered in shrink film, this was a lot of fun to build and fly.
If you like scale model airplanes imagine flying what you built in plastic. I added a pilot that I painted and flying wire to this one, the wire if done right is not the only scale but is functional to hold the right "wash" to the wing.
Through this process to start, one thing became evident that when I embark on each part, the list of things to explain gets very long. Much like when you are relating how to make some dish in the kitchen, explaining the framework of the how when you realize the person you are talking to might not have ever measured out ingredients or preheated an oven let alone knows what blanched means or what happens when you clarify butter.
So when writing I want to be thorough but not overly so. My last addition on servos I felt I had to get into a bit since I have not found a lot of good explanation on the subject. It was always specific to a type of vehicle and I have seen them all and found a few things I wanted to share.
This was a nitro powered plane I converted to electric. 56" wingspan.
The motor and batteries we use in model aircraft have had some real changes in the last 20 years and there has been so much written on these subjects already I will be pointing readers to some established places of knowledge along with trying to shed some light on all the lingo when it comes to that stage of the build.
Flys better than a nitro powered plane
Next step is to make this project look more like a plane and get the main wing on and that will be the next post. Until then I would like to provide some links to information that doesn't need to re-written.
The Glossary is self-explanatory. The link to motors is a decent primer. Battery University is a place everyone from all walks of life should read at least Part one. When I have heard stories about people that freeze their batteries to rejuvenate them or they buried them in their yard, pointed them west when mercury was in retrograde with mars etc. I send them to B.U. and debunk the nonsense. There are links to specific batteries and the LiPo type being the one I will use.
Servos. They articulate movements in assembly lines, robots, satellites, radio control, planes, cars, boats, helicopters and about anything you can imagine that needs something moved remotely. The Latin translation is "slave" and that is essentially their function.
A Size For Every Application.
I have always thought the word Servo sounded like a breakfast cereal. New Nabisco Serve-O's now with fortified teeth decaying sugar. The cranky hobbyists didn't like my sense of humor when they apprehensively asked for the correct "server" for their project when I was in the hobby shop. I would respond by asking them if they wanted Pentium or AMD. Maybe I do not know a good way to help a brother out to stop calling something the wrong name but I would let them know it was a "Servo" trying hard to not be the know it all ass-hat hobby guy but sometimes all good intentions...
Some common park, and indoor flyer servos
My intentions really were to fill gaps in knowledge about what servo to buy and that brings me to the purpose of this post, if you ever have found yourself looking for a servo or may in the future I hope to leave you with something to work with.
What you get when you buy a servo, a variety of control horns and screws
Arms, Horns, Wheels and rubber dampers to keep nitro engine vibration away from the servo
Generally kits, plans and ready to go RC stuff will have some reference to what servo you might need for a Radio Control project be it air, and sea or robot. There might be a size requirement, torque or speed needed and as you will learn there are multitudes and combinations of all those items.
This is a continuous 360-degree servo with a geared wheel for some type of robotic use. Notice the brand "Fitec"? The biggest servo company is "Hitec" and right here is a great example of why to not trust equipment or their claims when it is evident they are trying to free ride on a namesake
To start let us look at some servo facts:
Most servos move 180 degrees but there are others that move 360 degrees and ones with a continuous movement that are for winding up a cord on a sailboat's mainsail. there are special movement ones for Aircraft with retracts. Robot hobbyists also have some that are specific to their uses.
The servo cases are made from plastic and in some cases metal with a built-in heat sink to dissipate the motor heat. Some servos are available as waterproof.
Here is a servo with the bottom half of the case made from aluminum to dissipate heat from it operating
Servos have 3 wires consisting of a +, - DC voltage and signal wire. One end of this has a 3 conductor plug that plugs into the receiver or robot servo board. The voltage is supplied here as well and it is typically 4.8 Volts DC up to 7.2 Volts DC on some select servos. Always check manufactures voltages to be sure so you know what voltage to supply it.
Red is +voltage Brown is - Voltage and yellow-orange is the signal wire
Another thing to note is that manufacturers like to make you guess, hook the servo up backward and buy another one. So watch the colors and read the little paper in 50 languages that came with the servo. Unless they have red and black with some other color you can usually trust red is + and black is -
The wiring connects to a control board inside the servo and it controls the motor via the pulses received through the signal wire. The motor is geared to reduce the RPM of the motor at the output shaft of the servo where the servo control horn connects.
Here you can see the internal gears, this is one of the servos I will use
On the bottom inside is the electronics that control the motor, this is an analog servo
Higher duty servos are available with metal gears and most decent servo manufactures sell internal replacement gears. There are some with carbon composite gears lighter than metal and Delrin with strength in between the two.
You can see the Metal output gears here and one has a metal case. These are both examples of a low profile servo where you might need space below where the servo mounts. Notice the black one has a Brushless motor this is more efficient motor providing serious torque and speed.
The servo output shaft is splined so servo horn will lock in place when pressed on and it followed up with a screw in the center to hold it on. Be aware manufactures all have different splines there is no standard. Makes me mad people new to the hobby will struggle with this issue since manufacturers do not make this very clear.
Shaft Splines
Adjustable Servo Horn
Aftermarket servo control horns or arms, very stiff aluminum sometimes with machine thread, great for cars and helicopters
There are two types of servos, Analog and digital. I will try and explain the difference.
Every 20 milliseconds a pulse is sent to the servo to tell it what position the servo should be in to match what you are doing with the sticks or controller via radio waves. So if you are moving the radio stick control you set up to control the rudder and you want it to move right the radio sends pulses in those 20-millisecond window frame to the servo to move it. The PWM frequency is 50hz. A longer pulse moves the motor farther but the transit time to get there is limited by that 50hz.
Think of a ceiling fan, especially the variable ones. You turn it on and it takes a moment to spool up to speed, or if is variable there is a moment to see the increased speed you requested. This situation can be bad in servos. You give input to stick, the frame rate is 50hz, the servo responds and moves but the amount of power or torque it can have is limited because it doesn't "spool up". The feel at the sticks is spongy.
Here are the 180 degrees of travel, the splines are offset so you never get it dead center and equal points on each side but no worries the radio transmitter takes care of centering this up
So what if we increase that frequency by changing the tiny electronics inside the servo, change the circuit from analog to digital. Take out the transistors and replace them with the logic chips and small processors. Now the frequency is 300hz and the speed is increased along with a new ability to develop the needed torque. The mechanics are the same but we just improved it by talking to it faster.
So now you are thinking why would you ever use an analog servo since digital is so much better, well cost is one big factor the second is they just are not needed in most cases.
I'll give some examples:
The plane I am building is fine with analog servos, it is a foam plane and while I intend on making it rigid there is going to be some flex in the plane and the mechanics. It is a fun park flyer, not a precise pattern plane or competition 3d plane. I don't need overly snappy controls and the added expense would be lost on this airframe.
If I was building a helicopter I would not attempt it without digital servos and some really fast ones. The tail collective pitch the main head and the collective pitch, I want instant control as fast as possible input and transit time. I would also opt for metal gear servos which are more resistant to stripping.
RC Monster or stadium trucks, including buggies I would want some serious torque for the steering servo to move those giant tires around same with a rock crawler. Metal gears are a must here. Nitro vehicles through an analog cheap servo are just fine for the throttle control.
On aircraft, the name of the game is weight and weight to thrust ratio so keep the servos light but with enough balls to move a rudder or elevator under a load of flying. There is a lot of air going over those surfaces adding forces on them the servo has to work against to move it or in some cases resist moving it too far. Nitro planes have no need for digital control of the throttle just like the land vehicles.
With all this said when it comes to choosing a servo:
Consider the physical size.
Speed
Voltage (see the torque and speed increase with voltage increase on some models)
You can see just one company has a ton of offerings. The servo I am using is comparable to the Hitec HS-55 on that page. Now let's get one thing straight Spec reading is misleading. In the past, I have weighed parts, ran a test with watt meters on the current drain and all I can say is consider them rough guidelines. For instance, some companies weigh the servo without wires and plug, with or without control horn and the screw that holds it on. So in an attempt to market it as lighter, it is the same and even heavier in some cases after the required hardware and wiring is added to use it. The other thing I have found is a servo advertised as metal with only one metal gear.
When it comes time to program the transmitter I will go into some more detail but a few things to know once it is all set up.
Here is a high-quality servo from Hitec notice the ball bearing where the output gear exits the case with titanium and brass gears
In the programming of most modern transmitters, there is the ability to reverse the direction of the servo, set the endpoint limit of travel each way and reduce the overall travel. There is also a function called exponential, this is a way to achieve a different feel of response and also tame down something a bit too lively. Let's say you set your exponential at 80% now the center of the stick will be dead in the first 20% of its movement and this keeps you from twitching and overcorrecting. If it was set at 10% you would have to almost bury the stick one way to get the servo to move. The other function common on transmitters is "Dual Rate" or even Triple rates meaning a switch on the radio can be set up to have more limited movement of the travel. You may be able to get a huge amount of deflection of your rudder or elevator but do you need that much? Set up for lower rates is a great idea to make that first take off so you don't stall or drive it into the ground right off. Once in the air, you can flip the switch for full rates and go all Chuck Yeager.
I try to get what is called "Three Mistakes High" meaning get up at least 100 feet or so in the air before you summon your inner Top Gun and you have some time before you meet terra firma to correct.
Radio brands have some different ways and nomenclature of going about these functions so always RTFM(Read The F%@**ing Manual). on the radio.
With all this talk of analog and digital, I don't want to leave out the good old mechanical advantage of how the servo is installed.
If the pushrod is attached to hole 1 the servo will move the least to move the surface the most
Typically Servo control horns and surface control horns have multiple holes to attach the pushrod. In basic terms at the servo the farther out the hole is from the output of the servo the more leverage you have, and at the control surface, the opposite is true. There are limits to this, of course as the horn moves it is at an arc and at some point, the lever arm can get too long. Also at the surface control horn if is too close to the surface itself and needs a big movement the pushrod can run into the surface itself bending to try and push it further.
More times than not when I have encountered a servo not doing what it is supposed to do it was the mechanical setup of pushrod and linkages. Friction and any loss of rigidity in the pushrod is the enemy.
I couldn't make a small post on this subject I know it is a lot to read but I hope I shed some light on a device used a lot in a lot of places in our hobbies. I am going to finish this off with an example of another use of a servo on a little robot I built using Arduino, some stepper motor drivers, one servo and an ultrasonic sensor.
I said when the weather showed promise I would get back to building my RC plane project. (see parts 1-4) Today, I enjoyed some high 70-degree weather and there is a lure of days of sunny weather ahead so I should see some days with still air.
I had stated I had a few goals; 4 channel, 8-ounce flying weight or AUW, to have a landing gear, big wheels, ailerons and be able to fly some basic aerobatics. My basic construction is foam board, carbon fiber rod, and a basswood stick.
I want to talk about the foam board I am using. There are a few "aircraft" type foam sheets out there available to buy. Depron is the name most are familiar with. Midwest Balsa made some called Cellfoam88 but have since discontinued as well as few others made varieties. It is all essentially a cell foam that is unskinned meaning it does not have a paper skin on it like poster board. Kit manufactures laser cut it for really nice fitting kit parts. Most construction of these planes uses very small diameter carbon rod or tube that is CA(super glue) glued to the foam to stiffen it up and make some pretty rigid airframes. Unlike balsa wood planes the foam planes can be pretty easy to repair.
Just to clarify the foam I am referring to is a sheet, injection type styrofoam is also used for RC planes. The sheet foam renders a "profile" type plane although it can be paneled like thin balsa sheet to make full dimensional fuselages and airfoils. Some of the "aircraft " type foam sheet is sorta expensive in my opinion, it typically comes in 1, 3, 5mm thicknesses.
What I am using is really cheap, in fact, $1 for a 2'x3' sheet. It is Dollar store poster board that has a paper on it. I run some warm water in the bath and soak a sheet for a few minutes and the paper skin peels right off both sides. Now it is near or the same weight of the expensive "aircraft" foam sheets.
Now you have some sheets of foam ready to cut up into parts, the laser cutter is awesome but a box of sharp razor blades and a good straight edge you can make some cool planes. Don't waste your time with a hobby knife unless you want to swap the blade out every few minutes, as soon as the foam starts to stagger or pile up while cutting the blade is shot. Foam kills blades fast.
At this point, I want to point to some places you can download and print off a tiled PDF to tape together and cut out for templates to make your own plane. Everything from high wing trainers to Jets can be made for RC out of foam sheet.
There are many types of glue you can use to join foam and join the carbon rod to the foam. Just always consider weight, which means first use as little glue as you need to make it join no more. Second, choose a glue that is lightweight and that would be CA glue or what many know as super glue. NOW a word of WARNING some CA glues will MELT the foam. That is good for styrene but no good for foam. So I can list a few I know have worked for me but Always Always take a scrap of foam and test it. If you are familiar with CA glue might know there are 'Foam Safe' CA glues and something called an Accelerator. Agin the foam safe I have melted some foam so test it. Accelerators for CA glue speed up the curing process and I hate using them. In my experience, the Accelerator crystallizes the exposed glue and makes the joint very brittle. So with all that said Test that glue, have patience and go get some education on CA glues. BSI Industries or Bob Smith are the kings of Epoxy and CA glue, in fact, you might have purchased some and didn't know it. Hobby Town USA, Tower Hobbies and a ton of others market the BSI glue on their own as well BSI labeled bottles. As a business, you can buy their product with your store's name on them like it your house brand glue. They have a good section of what glue to use for what and good videos on using their different products. The other brand I like is ZAP makers of Zap a Gap and others. I use the regular medium consistency CA glue on this and other foam without fail.
When sourcing the carbon fiber rod in most hobby shops, kite stores carry some selection. It is easily found online too. I try to use a diameter that is roughly 25-35% of the thickness of foam I am using, bigger, I feel is just extra weight. If in some cases I do use larger diameter I try to use tubing instead of a rod for the weight savings. Truth is when you drive an RC plane into the ground a few thousands of an inch would not have saved the plane from total destruction. Every now and then the ground just jumps up and its back to the workbench.
The other supplies needed for foam RC planes are clear scotch or similar tape. This used to hinge control surfaces as well as seal them from air breaking through the hinge point. Look for the thinnest lightest tape possible, I have found some cheap packing tape is terrible for shipping boxes but great for RC planes.
Low temp hot glue is very handy to fix servos and other radio gear to the planes and can be peeled off later and reuse the electronics, just don't use too much it is heavy.
Now back to building...
I got creative looking around for some wheels for this plane an ended up taking some condiment cups and trimming them, adding a circle of foam to fill and for more rigidity. I then cut the tube from a mixing pipette and used it as the bearing to ride on the music wire axle. I set some weight on the plane to simulate it fully built and loaded and I think they will work just fine.
They are really rigid for what they are made of.
The wheel will ride on the lip of plastic
.
A small piece of shrink tubing on the axle end holds the wheel on, these can easily be painted
Next, I cut and attached my tail section to the fuselages. I glue foam to carbon rod onto both surfaces to not only stiffen up the foam but it provides a nice round to round surface to rotate against as the surface is moved. Then the clear tape is used as the hinge I re-designed the rudder section I needed clearance for elevator throw and wanted a bigger one to have a bit more if I can get this to knife edge in flight.
I found a sole tail lightweight tail wheel I had and in the end, I might need to ditch it for something lighter yet but I went ahead and made this a steerable tail. Glued the carbon rod into an aluminum tube which ended up going through the wood stick at end of the fuselage and another small piece of music wire glues inside of the bottom of the aluminum tube to bend and hold the wheel.
CA glue carbon rod into the aluminum tube
I bevel sand the ends of each piece of foam where I attached the carbon rod. This keeps the edge of foam from hindering or limiting throw.
Tubing passes through the wooden section making it like a bearing block
Note the triangular plastic piece sticking out of the rudder and elevator, these are called "control horns" I had some laying around but here are 2 types available from many hobby shops and online.
As you can see EFlite are pretty proud of their products, I am a big fan of Dubro hardware products, Type 3 would be my choice since they have more holes, which governs your mechanical leverage in conjunction with the horn on the servo. A push rod runs between them.
The pivot hole of the horn needs to be right over hinge of surface or you will not have equal throw both ways.
Starting to look like something that should fly
I did a weigh in so far and knowing what my radio gear weighs this is looking like it is going to meet my weight goal.
I have set the top where the wing will set and the Incidence it will have. and yet decide how I will mount the servo and linkage for the ailerons.
I will have more to update on the build but that will be in next post. Thanks to all following along I hope to be out to fly next weekend and I will be filming the flight.
When building the Fuselage for an airframe you have a few things to consider or at least I did when designing this. First off how will it land? Sailplanes and gliders usually do not have any landing gear with the exception of a nose roller to help it slide. In the RC world, a lot of aircraft are called "belly landers" They might be somewhat scale planes, or profile scale but no gear. Why? Well for one it saves weight but another issue is the punishment landing gear goes through on RC aircraft. One hard landing on some planes tears into the fuselage from the way it is designed. Even in a perfect landing long grass can be a real challenge not to nose the plane over breaking props, motor mounts etc. Imagine in scale, you are landing in a 10' high cornfield. So when there is no gear you hand launch, which can take a bit of practice and when hand launching pusher prop types it takes a bit of a dance to keep from getting bit. This all depends on where you have available to fly, I am using a landing gear since I have a few hard surfaces available I can take off and land from.
The next thing to consider is where your gear will go since I am doing this from scratch I have no point of reference as to where the weight of gear should go, the center of gravity etc. So I need to not only allow room for gear but have some latitude to move it around to achieve a proper center of gravity balance.
I used a basswood stick 6mm x 610mm as the rear fuselage, the foam I add is only to lessen drag a bit and give me a wing mount. I used some lightweight plywood for my motor mount/firewall. The stick is basically the datum line of the aircraft.
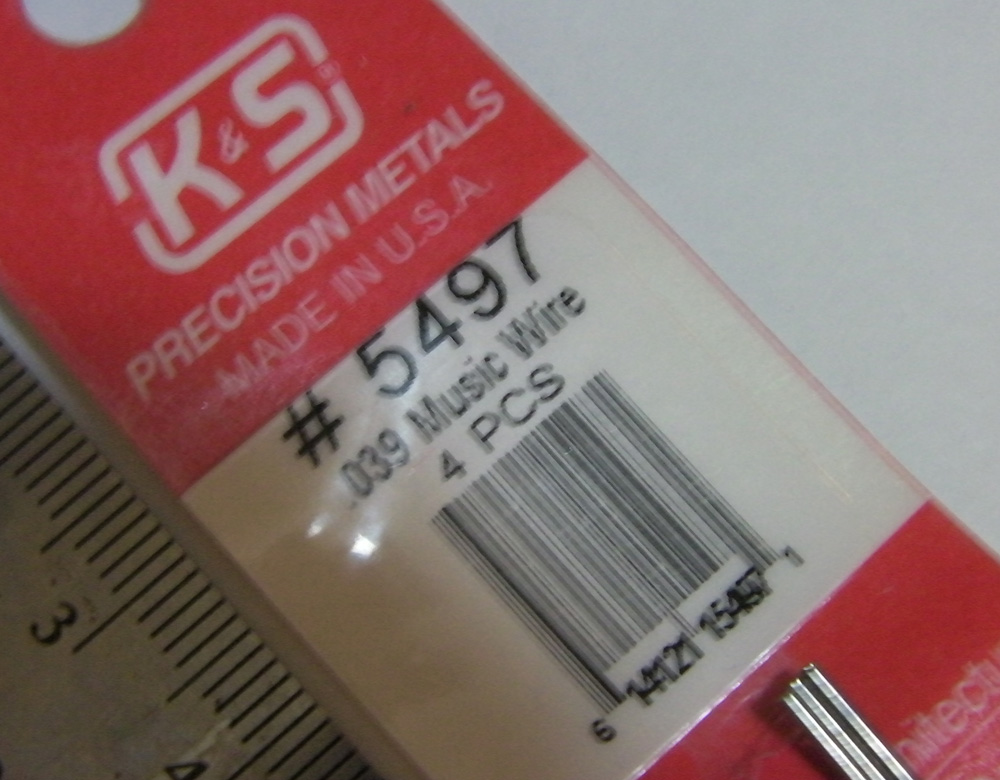
The landing gear is .039 music wire bent to give some shock absorption to my gear. I used some scrap light ply to make a reinforcement to sandwich wire to main stick. I grooved stick slightly to allow the wood plate to fit flat. I used regular Titebond 2 wood glue. Keep in mind using only glue you need, it is amazing how much gratuitous use of glue can add, and we want as little weight as possible added.
I could put a small section of bent music wire in the tail to make a taildragger but sometimes trying to steer on the ground can be a challenge when all you have is the rudder and prop wash to steer. I will show later how I make the tail steerable.
Lastly, how will the main wing mount? Wings have incidence which is the angle of attack it has, higher on the leading edge with a 4-7 degree drop at the trailing edge of the main wing. I am going to use foam board sides of the fuselage to create the wing mount and its incidence which I am going to go with 5 degrees.
First off, one thing that needs to be clear, in order to build a decent electric Radio Control airplane you must have a few excellent aircraft related movies or TV shows to watch while you build. "The Battle of Britain" or "Midway" usually suffices for me. If I really need some inspiration for "Flight of the Phoenix" either versions are the ticket.
Those movies have some iconic aircraft that is inspiring and with that said when someone wants to jump into RC planes, they want a P-51 Mustang, Spitfire or a Corsair. Well just like Elliott says Model Aircraft have to have the same dynamics as the real thing. Pilots do not start off flying low or mid wing planes like the popular warbirds they start with trainers and hopefully, I can explain why this a good plan to follow.
There are many types of airframes but for the purposes of this blog here is the Basic Three:
Let's start with the high wing, this image is a Cessna 172 but it could be a Piper Cub or other similar airframe. Think of a Pendulum on a clock, the weight of the high wing plane is below the wing. It adds to the self-righting of the plane. How many times have you seen a Piper Cub do a roll or much in the way of aerobatics? Not much the airframe does not lend itself well to being upside down. An easy way to start flying, notice this one has a tricycle landing gear, some would argue the tail-dragger style of cubs are easier to land and to start off landing with. As far as RC aircraft the Tail Dragger is easier on repairs from hard beginner landings or if you find yourself like I do taking off and landing in tall grass a taildragger can be a huge advantage over trike gear. Regardless, once in the air, a high wing can be very forgiving, when control surfaces are trimmed out properly it can usually fly straight without input to stick. Most can even be flown with rudder elevator only to ease a pilot into using the ailerons.
The mid-wing Edge 540 is a very popular plane among sport and 3-d flyers. Where the wing is almost in line with horizontal stabilizer it becomes something that can be flown on its side easily (knife edge) or flies inverted. almost as if the plane is equal when inverted to the dimensions as it is right side up. Planes like these require constant input from the stick, if it goes on its side you have to "right" it. Throttle, Ailerons, and elevator become main controls with rudder playing a huge part when on its side as it becomes the elevator and now the elevator is the rudder. Both surfaces are considerably bigger than on a high wing plane. The mid-wing helps to eliminate a "coupling" between the main wing and the tail stabilizers. On some aircraft when attempting a roll via ailerons it requires a lot of input from tail surfaces to keep roll even as it turns into a loop midway. Makes for very clean sharp rolls aka "snap roll". Planes like these usually have a lot more power to make use of as well.
The p-51 like many other "warbirds" have a low wing. These planes had payloads with external fuel tanks and weapons. Other requirements for them like carrier decks and limited runways among a big list of other things that civilian aircraft did not. The real ones took lots of training to fly well. They were essentially designed from the point of trying to outfly enemy aircraft, like tighter turning, tighter loops, etc. As far as RC aircraft goes I would not want to discourage anyone from flying what they want but you might want to have some spares around if you start this way. But you know that feeling when you have built a really great static model? It is a whole other dimension to fly it in front of you, see it against the skyline and land it. Bottom line they are hard to fly compared to a trainer but a great thing to look forward to as a goal.
I have a few parts cut out I will go into more detail in next post.