Monday, May 7, 2018

I Think I’ll Just Wing It. Pt.6 - Servos 101

Servos. They articulate movements in assembly lines, robots, satellites, radio control, planes, cars, boats, helicopters and about anything you can imagine that needs something moved remotely. The Latin translation is "slave" and that is essentially their function.

A Size For Every Application.

I have always thought the word Servo sounded like a breakfast cereal.  New Nabisco Serve-O's now with fortified teeth decaying sugar. The cranky hobbyists didn't like my sense of humor when they apprehensively asked for the correct "server" for their project when I was in the hobby shop. I would respond by asking them if they wanted Pentium or AMD. Maybe I do not know a good way to help a brother out to stop calling something the wrong name but I would let them know it was a "Servo" trying hard to not be the know it all ass-hat hobby guy but sometimes all good intentions...
Some common park, and indoor flyer servos

My intentions really were to fill gaps in knowledge about what servo to buy and that brings me to the purpose of this post, if you ever have found yourself looking for a servo or may in the future I hope to leave you with something to work with.
What you get when you buy a servo, a variety of control horns and screws
 Arms, Horns, Wheels and rubber dampers to keep nitro engine vibration away from the servo

Generally kits, plans and ready to go RC stuff will have some reference to what servo you might need for a Radio Control project be it air, and sea or robot. There might be a size requirement, torque or speed needed and as you will learn there are multitudes and combinations of all those items.
This is a continuous 360-degree servo with a geared wheel for some type of robotic use. Notice the brand "Fitec"? The biggest servo company is "Hitec" and right here is a great example of why to not trust equipment or their claims when it is evident they are trying to free ride on a namesake

To start let us look at some servo facts:

Most servos move 180 degrees but there are others that move 360 degrees and ones with a continuous movement that are for winding up a cord on a sailboat's mainsail. there are special movement ones for Aircraft with retracts. Robot hobbyists also have some that are specific to their uses.

The servo cases are made from plastic and in some cases metal with a built-in heat sink to dissipate the motor heat. Some servos are available as waterproof.
Here is a servo with the bottom half of the case made from aluminum to dissipate heat from it operating

Servos have 3 wires consisting of a +, -  DC voltage and signal wire. One end of this has a 3 conductor plug that plugs into the receiver or robot servo board. The voltage is supplied here as well and it is typically 4.8 Volts DC up to 7.2 Volts DC on some select servos. Always check manufactures voltages to be sure so you know what voltage to supply it.
Red is +voltage Brown is - Voltage and yellow-orange is the signal wire

Another thing to note is that manufacturers like to make you guess, hook the servo up backward and buy another one.  So watch the colors and read the little paper in 50  languages that came with the servo. Unless they have red and black with some other color you can usually trust red is + and black is -

The wiring connects to a control board inside the servo and it controls the motor via the pulses received through the signal wire. The motor is geared to reduce the RPM of the motor at the output shaft of the servo where the servo control horn connects.
Here you can see the internal gears, this is one of the servos I will use
On the bottom inside is the electronics that control the motor, this is an analog servo


Higher duty servos are available with metal gears and most decent servo manufactures sell internal replacement gears. There are some with carbon composite gears lighter than metal and Delrin with strength in between the two.
You can see the Metal output gears here and one has a metal case. These are both examples of a low profile servo where you might need space below where the servo mounts. Notice the black one has a Brushless motor this is more efficient motor providing serious torque and speed.
The servo output shaft is splined so servo horn will lock in place when pressed on and it followed up with a screw in the center to hold it on. Be aware manufactures all have different splines there is no standard. Makes me mad people new to the hobby will struggle with this issue since manufacturers do not make this very clear.
Shaft Splines
Adjustable Servo Horn
Aftermarket servo control horns or arms, very stiff aluminum sometimes with machine thread, great for cars and helicopters

There are two types of servos, Analog and digital. I will try and explain the difference.

First, both types receive a signal that is a PWM or Pulse Width Modulation.  

Every 20 milliseconds a pulse is sent to the servo to tell it what position the servo should be in to match what you are doing with the sticks or controller via radio waves. So if you are moving the radio stick control you set up to control the rudder and you want it to move right the radio sends pulses in those 20-millisecond window frame to the servo to move it. The PWM frequency is 50hz. A longer pulse moves the motor farther but the transit time to get there is limited by that 50hz.

Think of a ceiling fan, especially the variable ones.  You turn it on and it takes a moment to spool up to speed, or if is variable there is a moment to see the increased speed you requested.  This situation can be bad in servos. You give input to stick, the frame rate is 50hz, the servo responds and moves but the amount of power or torque it can have is limited because it doesn't "spool up".  The feel at the sticks is spongy.
Here are the 180 degrees of travel, the splines are offset so you never get it dead center and equal points on each side but no worries the radio transmitter takes care of centering this up

So what if we increase that frequency by changing the tiny electronics inside the servo, change the circuit from analog to digital. Take out the transistors and replace them with the logic chips and small processors. Now the frequency is 300hz and the speed is increased along with a new ability to develop the needed torque. The mechanics are the same but we just improved it by talking to it faster.

So now you are thinking why would you ever use an analog servo since digital is so much better, well cost is one big factor the second is they just are not needed in most cases.

I'll give some examples:

The plane I am building is fine with analog servos, it is a foam plane and while I intend on making it rigid there is going to be some flex in the plane and the mechanics. It is a fun park flyer, not a precise pattern plane or competition 3d plane. I don't need overly snappy controls and the added expense would be lost on this airframe.

If I was building a helicopter I would not attempt it without digital servos and some really fast ones. The tail collective pitch the main head and the collective pitch, I want instant control as fast as possible input and transit time. I would also opt for metal gear servos which are more resistant to stripping.


RC Monster or stadium trucks, including buggies I would want some serious torque for the steering servo to move those giant tires around same with a rock crawler. Metal gears are a must here. Nitro vehicles through an analog cheap servo are just fine for the throttle control.

On aircraft, the name of the game is weight and weight to thrust ratio so keep the servos light but with enough balls to move a rudder or elevator under a load of flying.  There is a lot of air going over those surfaces adding forces on them the servo has to work against to move it or in some cases resist moving it too far. Nitro planes have no need for digital control of the throttle just like the land vehicles.

With all this said when it comes to choosing a servo:
  1. Consider the physical size.
  2. Speed
  3. Voltage (see the torque and speed increase with voltage increase on some models)
  4. Tourque
Take a look here: Servo City

You can see just one company has a ton of offerings. The servo I am using is comparable to the Hitec HS-55 on that page. Now let's get one thing straight Spec reading is misleading. In the past, I have weighed parts, ran a test with watt meters on the current drain and all I can say is consider them rough guidelines. For instance, some companies weigh the servo without wires and plug, with or without control horn and the screw that holds it on.  So in an attempt to market it as lighter, it is the same and even heavier in some cases after the required hardware and wiring is added to use it. The other thing I have found is a servo advertised as metal with only one metal gear.

When it comes time to program the transmitter I will go into some more detail but a few things to know once it is all set up.

Here is a high-quality servo from Hitec notice the ball bearing where the output gear exits the case with titanium and brass gears

In the programming of most modern transmitters, there is the ability to reverse the direction of the servo, set the endpoint limit of travel each way and reduce the overall travel. There is also a function called exponential, this is a way to achieve a different feel of response and also tame down something a bit too lively. Let's say you set your exponential at 80% now the center of the stick will be dead in the first 20% of its movement and this keeps you from twitching and overcorrecting. If it was set at 10% you would have to almost bury the stick one way to get the servo to move. The other function common on transmitters is "Dual Rate" or even Triple rates meaning a switch on the radio can be set up to have more limited movement of the travel. You may be able to get a huge amount of deflection of your rudder or elevator but do you need that much? Set up for lower rates is a great idea to make that first take off so you don't stall or drive it into the ground right off. Once in the air, you can flip the switch for full rates and go all Chuck Yeager.

I try to get what is called "Three Mistakes High" meaning get up at least 100 feet or so in the air before you summon your inner Top Gun and you have some time before you meet terra firma to correct.

Radio brands have some different ways and nomenclature of going about these functions so always RTFM(Read The F%@**ing Manual). on the radio.

With all this talk of analog and digital, I don't want to leave out the good old mechanical advantage of how the servo is installed.
 If the pushrod is attached to hole 1 the servo will move the least to move the surface the most

Typically Servo control horns and surface control horns have multiple holes to attach the pushrod. In basic terms at the servo the farther out the hole is from the output of the servo the more leverage you have, and at the control surface, the opposite is true. There are limits to this, of course as the horn moves it is at an arc and at some point, the lever arm can get too long. Also at the surface control horn if is too close to the surface itself and needs a big movement the pushrod can run into the surface itself bending to try and push it further.

More times than not when I have encountered a servo not doing what it is supposed to do it was the mechanical setup of pushrod and linkages. Friction and any loss of rigidity in the pushrod is the enemy.

I couldn't make a small post on this subject I know it is a lot to read but I hope I shed some light on a device used a lot in a lot of places in our hobbies. I am going to finish this off with an example of another use of a servo on a little robot I built using Arduino, some stepper motor drivers, one servo and an ultrasonic sensor.


- Hobby Dude


Friday, April 27, 2018

I Think I’ll Just Wing It. Pt.5

I said when the weather showed promise I would get back to building my RC plane project. (see parts 1-4) Today, I enjoyed some high 70-degree weather and there is a lure of days of sunny weather ahead so I should see some days with still air.

I had stated I had a few goals; 4 channel, 8-ounce flying weight or AUW, to have a landing gear, big wheels, ailerons and be able to fly some basic aerobatics. My basic construction is foam board, carbon fiber rod, and a basswood stick.

I want to talk about the foam board I am using. There are a few "aircraft" type foam sheets out there available to buy. Depron is the name most are familiar with. Midwest Balsa made some called Cellfoam88 but have since discontinued as well as few others made varieties. It is all essentially a cell foam that is unskinned meaning it does not have a paper skin on it like poster board. Kit manufactures laser cut it for really nice fitting kit parts. Most construction of these planes uses very small diameter carbon rod or tube that is CA(super glue) glued to the foam to stiffen it up and make some pretty rigid airframes. Unlike balsa wood planes the foam planes can be pretty easy to repair.

Just to clarify the foam I am referring to is a sheet, injection type styrofoam is also used for RC planes. The sheet foam renders a "profile" type plane although it can be paneled like thin balsa sheet to make full dimensional fuselages and airfoils. Some of the "aircraft " type foam sheet is sorta expensive in my opinion, it typically comes in 1, 3, 5mm thicknesses.

What I am using is really cheap, in fact, $1 for a 2'x3' sheet. It is Dollar store poster board that has a paper on it. I run some warm water in the bath and soak a sheet for a few minutes and the paper skin peels right off both sides. Now it is near or the same weight of the expensive "aircraft" foam sheets.

Now you have some sheets of foam ready to cut up into parts, the laser cutter is awesome but a box of sharp razor blades and a good straight edge you can make some cool planes. Don't waste your time with a hobby knife unless you want to swap the blade out every few minutes, as soon as the foam starts to stagger or pile up while cutting the blade is shot. Foam kills blades fast.

At this point, I want to point to some places you can download and print off a tiled PDF to tape together and cut out for templates to make your own plane. Everything from high wing trainers to Jets can be made for RC out of foam sheet.
There are many types of glue you can use to join foam and join the carbon rod to the foam. Just always consider weight, which means first use as little glue as you need to make it join no more. Second, choose a glue that is lightweight and that would be CA glue or what many know as super glue. NOW a word of WARNING some CA glues will MELT the foam. That is good for styrene but no good for foam. So I can list a few I know have worked for me but Always Always take a scrap of foam and test it. If you are familiar with CA  glue might know there are 'Foam Safe' CA glues and something called an Accelerator. Agin the foam safe I have melted some foam so test it. Accelerators for CA glue speed up the curing process and I hate using them. In my experience, the Accelerator crystallizes the exposed glue and makes the joint very brittle. So with all that said Test that glue, have patience and go get some education on CA glues. BSI Industries or Bob Smith are the kings of Epoxy and CA glue, in fact, you might have purchased some and didn't know it. Hobby Town USA, Tower Hobbies and a ton of others market the BSI glue on their own as well BSI labeled bottles. As a business, you can buy their product with your store's name on them like it your house brand glue. They have a good section of what glue to use for what and good videos on using their different products. The other brand I like is ZAP makers of Zap a Gap and others. I use the regular medium consistency CA glue on this and other foam without fail.

When sourcing the carbon fiber rod in most hobby shops, kite stores carry some selection. It is easily found online too. I try to use a diameter that is roughly 25-35% of the thickness of foam I am using, bigger,  I feel is just extra weight. If in some cases I do use larger diameter I try to use tubing instead of a rod for the weight savings. Truth is when you drive an RC plane into the ground a few thousands of an inch would not have saved the plane from total destruction. Every now and then the ground just jumps up and its back to the workbench.

The other supplies needed for foam RC planes are clear scotch or similar tape. This used to hinge control surfaces as well as seal them from air breaking through the hinge point. Look for the thinnest lightest tape possible, I have found some cheap packing tape is terrible for shipping boxes but great for RC planes.

Low temp hot glue is very handy to fix servos and other radio gear to the planes and can be peeled off later and reuse the electronics, just don't use too much it is heavy.

Now back to building...

I got creative looking around for some wheels for this plane an ended up taking some condiment cups and trimming them, adding a circle of foam to fill and for more rigidity. I then cut the tube from a mixing pipette and used it as the bearing to ride on the music wire axle. I set some weight on the plane to simulate it fully built and loaded and I think they will work just fine.
They are really rigid for what they are made of.

The wheel will ride on the lip of plastic
.
A small piece of shrink tubing on the axle end holds the wheel on, these can easily be painted

Next, I cut and attached my tail section to the fuselages. I glue foam to carbon rod onto both surfaces to not only stiffen up the foam but it provides a nice round to round surface to rotate against as the surface is moved. Then the clear tape is used as the hinge I re-designed the rudder section I needed clearance for elevator throw and wanted a bigger one to have a bit more if I can get this to knife edge in flight.


I found a sole tail lightweight tail wheel I had and in the end, I might need to ditch it for something lighter yet but I went ahead and made this a steerable tail. Glued the carbon rod into an aluminum tube which ended up going through the wood stick at end of the fuselage and another small piece of music wire glues inside of the bottom of the aluminum tube to bend and hold the wheel.
CA glue carbon rod into the aluminum tube


I bevel sand the ends of each piece of foam where I attached the carbon rod. This keeps the edge of foam from hindering or limiting throw.


Tubing passes through the wooden section making it like a bearing block

Note the triangular plastic piece sticking out of the rudder and elevator, these are called "control horns" I had some laying around but here are 2 types available from many hobby shops and online.
As you can see EFlite are pretty proud of their products, I am a big fan of Dubro hardware products, Type 3 would be my choice since they have more holes, which governs your mechanical leverage in conjunction with the horn on the servo. A push rod runs between them.
The pivot hole of the horn needs to be right over hinge of surface or you will not have equal throw both ways.


Starting to look like something that should fly


I did a weigh in so far and knowing what my radio gear weighs this is looking like it is going to meet my weight goal.


I have set the top where the wing will set and the Incidence it will have. and yet decide how I will mount the servo and linkage for the ailerons.

I will have more to update on the build but that will be in next post. Thanks to all following along I hope to be out to fly next weekend and I will be filming the flight.
  • Hobby Dude

Saturday, April 21, 2018

Tamiya B.M.W. R75 WIP

I have always liked the odd vehicles used by the different militaries. The water, transport and supply trucks. The various earth movers used by engineers are all very cool. But I always thought a motorcycle, especially without a sidecar could be a very devious, fast and efficient tool in battle. If that isn't an attraction just watch Steve McQueen in the Great Escape. I know it is a Triumph mocked up like a BMW and he does get caught but it is one cool scene from a very iconic movie.


The BMW R75 was made between 1941 and 1946  they were used on the Eastern Front, Africa, and Europe. A 745cc Flat Twin engine powered it with an optional sidecar that it's rear axle connected to the rear of the R75 so the sidecar had a driven wheel. The was also a locking differential and selectable on and offroad gear ratios as well as a reverse gear so handling and adaptability were improved over older designs.


I did my research on the model beforehand and this is the part of the model building I love, learning the history. I usually start with the decals to see if the model was assigned somewhere and sometimes you even get options. This helps with the paint scheme and weathering especially. The R75 was used in the infantry, with tank groups, as military police, there were SS groups who used them and these decals reflected this. I looked up the group markings and found some direction. I have two complaints with this kit; first, the choices of decals limit you to having two figures belong to one group like Waffen SS  and since there are only decals for the two helmets you have at least one guy who is AWOL from and tank group. But hey, I am Hobby Dude so I bet there are some spare decals somewhere, Or more importantly it really doesn't matter.  :)


The other complaint is that there are no brake/clutch levers molded into the handlebars. The R75's levers were a little different than what is seen on most motorcycles, they came out of the ends of the bars instead of clamping inboard of the grips. This is really a better design as they would be less likely to snag on other riders, trees etc. So I thought I would add my own.


I used some shrink tubing and 2 staples bent around. A drop of CA glue to set them in them I touched a soldering iron to the staple to make the shrink tubing shrink around the grip without melting the plastic handlebar part.


Sorry for the bad pic, but using a bit of Tamiya putty and some MR. Surfacer then some black flat the grips and levers start to come together. The staple helps to leave an area in the proper place to later add a wire for the cables.

I want to mention some of the supplies I used for this project:
  1. Tamiya White Putty - Not my favorite, I like Squadron brand better but it works.
  2. Mr. Surfacer - There are so many uses for this and I try to keep 500 and 100 on hand, filling gaps is a breeze and I have even used it to make rivets and detail lines. Even a light airbrush coat with 1000 can be useful for prepping some surfaces like buildings.
  3. Tamiya Panel Line wash - I love this stuff for use before as a shading and after as a way to add a lot of dimensions.


For my face figure painting:


White for eye sockets, skin base and tone to start then shade around eyes, ears, mouth etc. I mix on a palet adding a drop of red or yellow from other paints to adjust tones. My goal is to make each skin and face unique each time so there is lots of this and that and mixing it all up.

When it comes to weathering there are so many ways to achieve what you want and I have found a few things helpful:
  • Cheap makeup from the dollar discount store, bonus if you find earth or Emo tones they work best for most weathering.
  • Oil pastels, these are endless with ways you can use them, mix a bit with thinner and do some pin wash, apply as is for shading. Another cheap item found that is very useful. while you are there get the cheap sponge brushes, you can get around 25 of them for 1/7th the price the Tamiya package of two.
  • Tamiya weathering kits, if you can find them cheap, they are great but at 10-$12 each there is not much in there and you will need more sponge brushes since each one has only one to share three colors.
  • Vallejo make some great washes  and I commonly use #74.505 light rust, #515 dark brown, #512 Dark green
  • Citadel Night Shade - This is sort of a dark blueish wash, I like using in conjunction with the Tamiya panel line wash to achieve multiple dark shading.


The figures in this kit have some decent detail seen once a bit of primer is applied after gluing and prep sanding. Primer helps me see where I still need to putty/file or sand still.


Like everything else, there are countless ways and methods to paint faces and I am always open to new methods but I will share what I have done.

I typically start with a white on the eyeball, if it were larger figures I would cut a little yellow into the white. Next, I use either dark brown or Blue to make an iris, then I shade a darker skin tone to the underside of the brow and above eye socket. Lighter skin tone goes below the eye and inside ears.  Using that same mixture of paint I add a tiny amount to red, mix and apply to lips. After each step, I apply gloss clear to lock in what I have done so far and to allow a smooth surface for washes if I decide to use at any point. I fill in the rest of the face and neck with varying skin tones. When I am finally done I will use some flat clear to cut back any un-natural gloss.


I still have a lot of detail and cleanup to do but they are coming along alright. In reality, only about 25% done.


When it came to assembling the motorcycle and sidecar beyond the brake levers I knew I wanted to add some plug wires and the sidecar needed to have seen some action.


Exhaust still needs its treatment and I still have saddlebags to make up and finish the rifles as well as the figures.


This is a very fun kit and should make a cool little display when all done.

Till Next time...
  • Hobby Dude
Monday, April 16, 2018

Barter Town

That is where I live, at least mentally and philosophically.

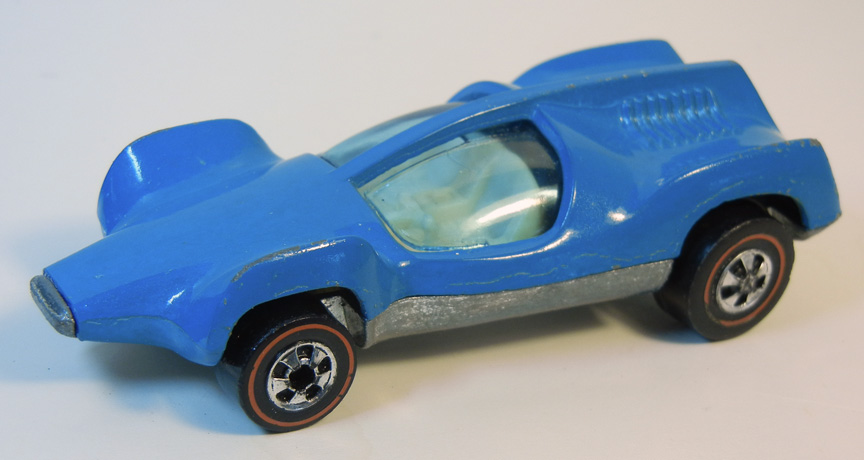
As a kid, I took my first trip to Barter Town with Hotwheels Cars. I never cared much for the Double Vision but Jeff Muxlow, a classmate liked it and was willing to part with his Red Baron in trade. From there it went to Football Cards, Yo-Yos and bicycle parts leading to a lifelong residence in Barter Town.


Take a look at most people's garages, basements, and closets and it is easy to say that interests and hobbies come and go at times. Check those roller blades you bought with all good intention during the Clinton administration, or telescope, skis or that Bedazzler Gun you bought late night on the home shopping network.


Amazingly enough, some of these things taking up that valuable closet real estate can be worth something to others and this is what Barter Town is all about. There are two types of people that live in Barter Town. First, you have the "NH's" which stands for "Near Hoarders" While having the appearance of hoarding there is actually an ebb and flow of stuff, they acquire, they trade. The second group, are the collectors. They very well may have just as much stuff as the NH's but it is organized and cataloged. When they acquire it is with an intent to fill a void in a collection or series etc.

My mother called me a "pack-rat" many times and while I will admit to being part of the evolution of collecting, that guilt just never stuck.  It is all subjective though as people may gaze upon your built and unbuilt models wondering about your priorities as they forget about the jet ski sitting their shed for the last 3 summers. I may have started off as a kid as a pack -rat but when you want something new as you open that closet and remnants of your past relationship with Ron Popeil are revealed it is time to take a trip to Bartertown.


Like any city I have my share of second hand and Goodwill thrift stores depending on the decade I have frequented many of these stores looking for diecast cars, vinyl records, guitars among many other things. A few years back I found an old CB radio in a goodwill marked $5  so I grabbed it to reuse the microphone in a ham radio project and maybe rob other parts. I took it home and hooked it to power and an antenna and it worked like it was 1977. The brand and model was a Pace 166 and after looking it up and finding 2 currently on sale for $300 and $500 on eBay it turned out this particular CB was the stock GM CB radio that came in the 1977 Pontiac Trans Am/Firebird/ Smokey and the Bandit Edition!  So not being greedy I put it up for an open auction and let the bidding begin. I ended up selling it for $350.  There have many finds that turned me some coin to toss at another interest.


There's a cool little retro type thrift store called "Time Bomb" near me I knew to have some models, he also has clothes, records, toys and lots of cool stuff from years ago. I trucked in there with some vinyl records to trade and came out with a cool pile of models.


I am excited to start the Patton Tank, especially since I scored so much to go with it.


Vietnam theme with a Mutt and resin figures from Verlinden to add to the M48A3.


Love the detail on resin and there are a few extra heads, weapons, etc. in these kits as well.


Also got a BMW R75 with a sidecar which I started already and will be posting it soon.


Lots to build until the spring rain and winds go away to inspire getting back to my RC plane project.

Back Soon.
  • Hobby Dude

Saturday, March 31, 2018

An Inspired Purchase. PT.2

I had not built an Airfix kit in some time, they are not that common to find on a store shelf. I think I can add Airfix to list of companies we need to see more of in the U.S.


These two kits are well worth the sub $10 prices. Great detail and decent fitting parts for the small scale. The smaller the scale the more a good mold is needed, those tiny details need to be sharp. The Tiger 1 kit had a little more flash than the Sherman but nothing to complain about.


Each model has 2 choices of decals reflecting the placement of Sherman either in Normandy June/July 1944  with options for  U.S. or British markings. After doing some research I found that the Sherman kit is not totally scaled correctly as far as the decals. I don't claim to know a lot about armor so weigh in if my research sounds bogus but U.S. tanks should have a number starting with 3, not T2. The group marking triangle on the front I found on later M4A3. Few other odd differences in front of tank and gun barrel when compared to images I found. I found some other reference to these things in some of the scale model forums. The British version seems to have the same issues with its decals. I found less information on the Tiger 1.


One of the things I love about building any model is the prep I put into research and the things I learn as I do. Each thing becomes a history, science and social education. I started this one with finding images of each tank, trying to place the camouflage and paint to the where and the when. I watched tourist videos of Normandy countryside, looked at pictures. Watched a few old war movies with their incredible inaccurate depictions of history.  It is like learning from correcting mistakes.


There were something like 50,000 Shermans M4XX Versions made between 42 and 45 with many sold or  "Lend-Lease" to the British, Canada, New Zealand, Australia, China, USSR, Poland, and France. A substantial amount did not make it through the D-Day landing. Some had blades equipped to the front to deal with obstacles on the beach. Flamethrowers and other changes in gun size, side floats and one that engineers built bridges with.


With all this in mind, I decided to build a "Somewhere in Normandy June/July 1944 as the Allies pushed east.

I still have the Tiger to finish and only a bit of weather left to do on the Sherman. On the Sherman, I added aluminum tubing for a more realistic gun barrel and made a few sandbags, logs, rope, and wood boxes for the rear.  I found some smaller scale Tulle Lace that worked out for the webbing. See my previous post about Tulle Lace Here. When the model is only 3" long it can be a bit of a challenge to make accessories let alone hold on to them, see them or glue them.


On the diorama, I still am waiting for trees to dry to add, as well as more landscape the details are added in layers. My eventual plan is to find some 1:76 or 1:72(I think it would look close enough) German soldiers and U.S. Paratroopers to add in.

That's all for now...

-Hobby Dude